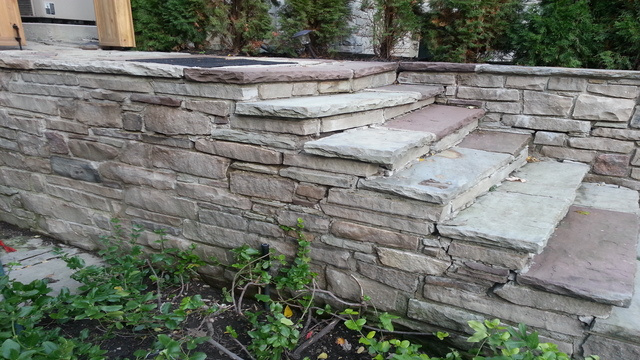
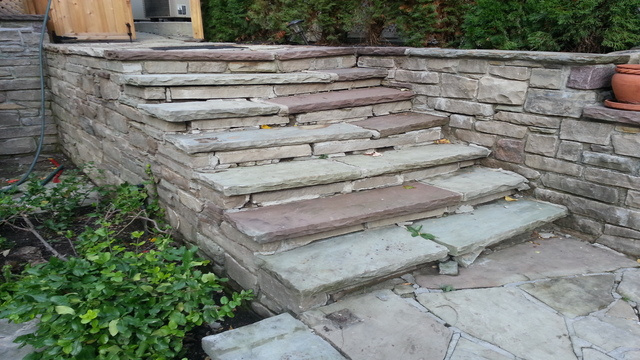
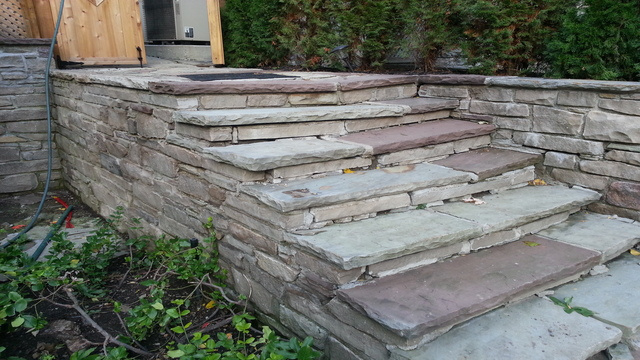
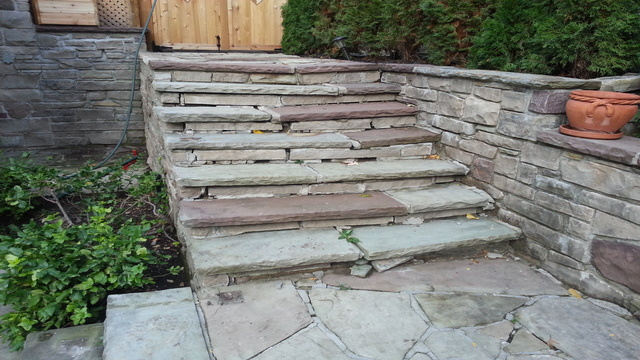
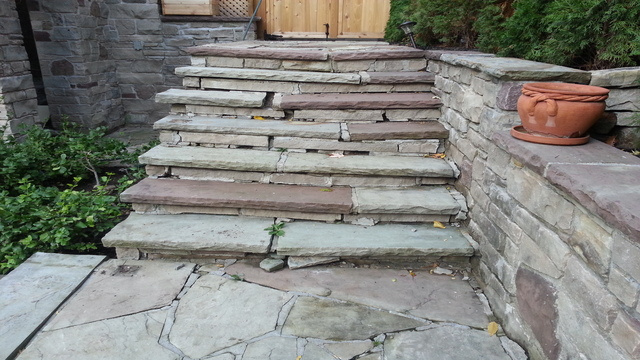
 When I was called out to look at a set of steps, I was thinking to myself on the drive out, steps, we’ve done tons of steps, this project sounds simple enough. Fix a set of steps, what could be so hard about that. If you look at the pictures below these steps settled singificantly in the middle, all the mortar was coming loose, they were getting unsafe and it was time to fix them. This set of steps is the main access into the backyard and it was getting harder and harder to traverse them, it was time.


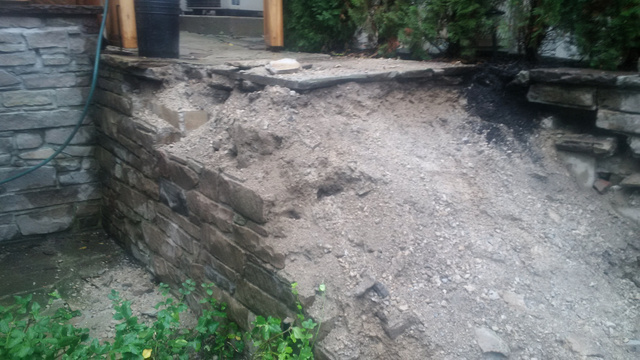
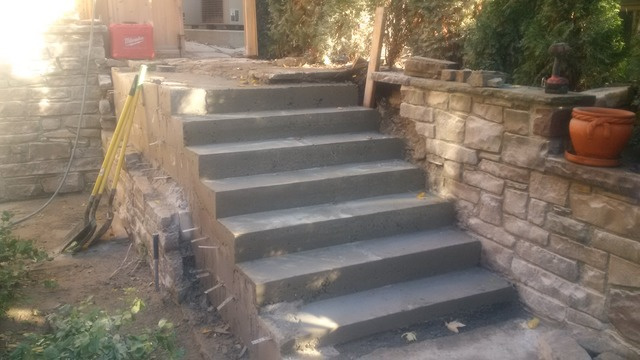
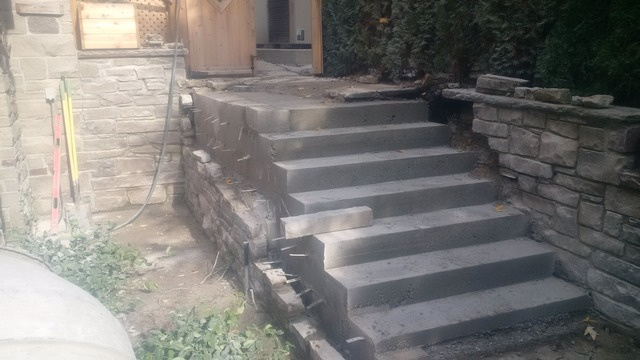
The plan of attack was to remove all the credit valley stones and set them down on the patio in the order in which they were removed. After all the stones were removed we would remove any gravel that was under the steps to a depth of approx 6”, wood forms would be built, steel rebar would be installed in the forms and concrete would be poured in the forms, fairly straightforward. After the concrete cured the flagstone would be reinstalled. A beautiful plan, fairly straightforward, unfortunately the plan fell apart after discovering what I’m about to discuss.
After the stone steps were removed my attention focused on the retaining wall, I knew the wall would need some work but I wasn’t sure just how bad it was until the steps were removed and we could see what was behind the wall. After really taking a close look at the retaining wall side, it was evident that there was something very wrong with this wall. There was a lot of cracking in the mortar and there was also a bulge in the wall, not a good sign. The strange thing about it, the bottom half of the wall looked in fairly decent shape, the top half of the wall and the step returns had major damage that would need to be fixed. As a matter of fact, when the steps were removed the retaining wall fell apart. This is why I say, when you undergo any hardscaping/landscaping project there is a good chance the scope of work will change and the project will expand. This is something one should be aware of before starting this type of work. One always hopes for the best outcome but once things are torn apart more work be needed to the integrity of the project is solid and won't have to be fixed in another year or two.


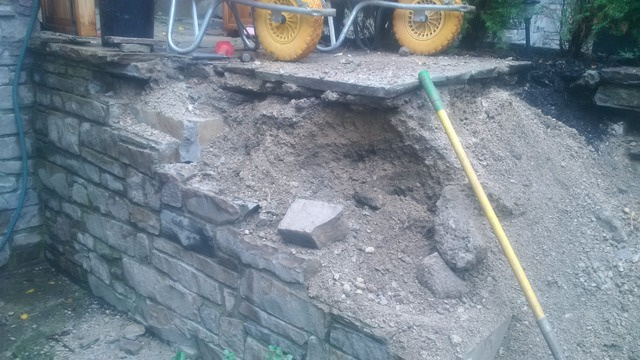
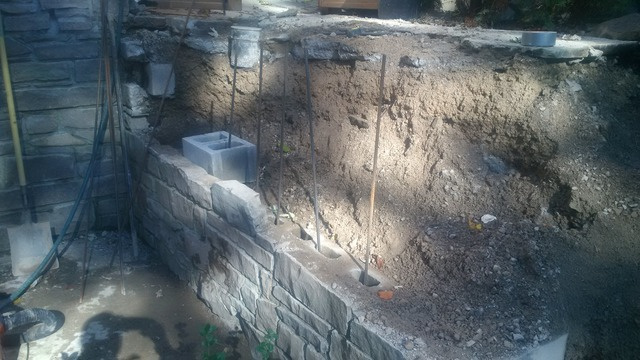
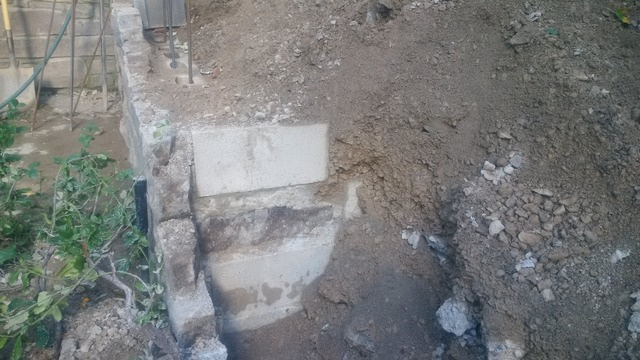
The retaining wall repair doubled the amount of work and accordingly, time was impacted also. If it were not for the fact that bottom half of the retaining was sound. This project could have went from a fairly basic step project to a complicated retaining wall project. If you have watched one of the videos below there is a section that shows the lower half of the retaining wall. The lower half was built fairly well, although the concrete block was too narrow for my liking. They built the wall with the right methodology, a concrete footer was installed, concrete block is built up and the stone ledgerock is built in front of the block. What was really strange about this wall, the bottom had the concrete block behind it, the upper half had nothing. The upper section was relying on 3’ - 4” ledgerock to hold up a 5’ wall, no wonder there was a problem, 4” is not enough material to hold back the pressure of a 5’ wall.
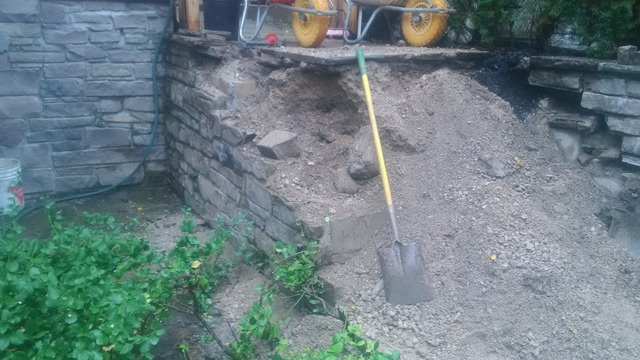
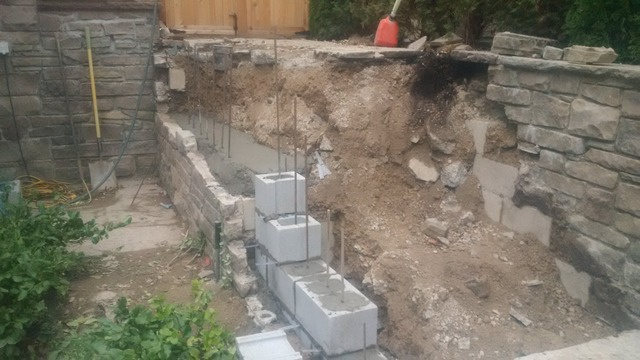
The retaining wall was built in an odd manner, the bottom 2 feet were built with a concrete block backer, it’s this concrete block that actually does the work of holding up everything behind it. At both ends of the wall there was another wall that ran perpendicular, back into the slope, it was a type of tie back system. We decided to keep this lower wall and keep building upward with concrete block, the block would be filled with steel rebar and be core filled with concrete. If the tie back returns weren’t there we would have had to take the wall down to the footing, possibly even redoing the footing. There is a cost to everything and the question is, how far do you go? The project had essentially doubled with the wall work. Taking the wall down to the footing would have increased the cost even more. Sometimes you have to make a decision, it may not be perfect but it’s the best decision you can make at the time.
How far do you go
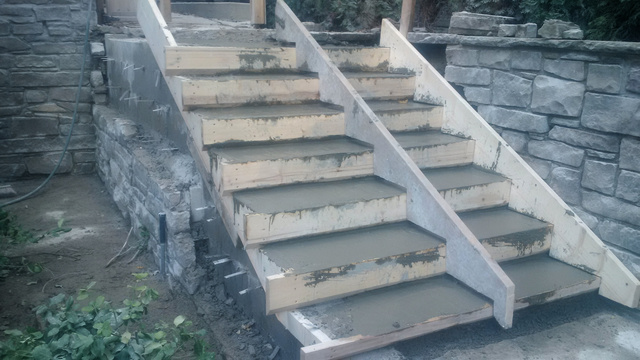
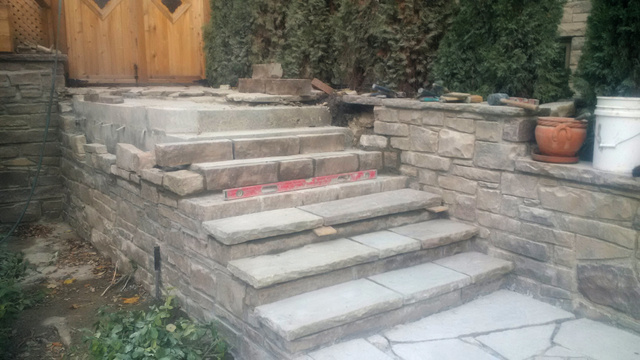
The wall was reinforced with steel rebar, concrete poured and concrete block built up to the desired height. Wood forms were built, steel reinforced and concrete poured. At this point we were on easy street. Now working on a solid platform the stone veneer was applied to the block and up we went. The stone coping was installed on the new concrete
Materials used on this project:
Step treads: Credit Valley Flagstone.
Step risers and retaining wall: Wiarton, Tiger stripe coursing.